Tampilkan postingan dengan label Pattern Drafting Tools. Tampilkan semua postingan

Think Beyond Size

Do you realize how irrelevant the term 'size' is when it comes to women's clothing?  In one store you might wear a 'size 8' and in the next store you might need a 'size 12'.  It all depends on the manufacturer and and the standards that they use for the expression of their clothing.  And if you have to choose the larger 'size', psychologically this could have a negative impact because you've had to choose the larger size.

It's a very provocative question isn't it when someone asks 'What size are you?'  This can mean many different things to different people.  So chuck those labels out the door and just be who you are!

Isn't it great that with the Sure-Fit Designs fitting system, size is totally a non-issue.  I've had many ladies email to tell me how wonderful it is to finally be liberated from even thinking about what size they might be.


Think 'measurement' not 'size'!  Many of you know that the Sure-Fit Designs master patterns offer measurement ranging from 28" (71 cm) to 62" (157.5 cm).  I know that in this photo you can't see all the measurement dots, but in every strategic location, there are a series of dots with the measurement numbers (both in imperial and metric) beside the dot.  All you do is mark in your unique measurement dots, then connect your dots together with the SFD Designing Stylus.  It's a great tool to use for drawing your personalized body blueprint with all the SFD master patterns.
Women have such unique shapes and Sure-Fit Designs provides such a great alternative to achieving the absolutely best fit for your body the way it is now.  Enjoy being who you are and the way you are right now.  Sewing well-fitting garments can only enhance how feel about yourself.  When your clothing fits...you simply feel better.  Enjoy this new-found freedom.

If you're new to Sure-Fit Designs and this blog, I'd encourage you to click on over to the SFD Learning Center Video Library to see the actual process of how to blueprint your body shape.

So as we say goodbye to 2014 and welcome in 2015 let's simply say 'adios' to all those stigmatizing labels and just be who we are.

Happy New Year,

Glenda...the Good Stitch!
(PS) Color blocking is coming!

Whew...It's all done! Let's Sew (easy) Collars!

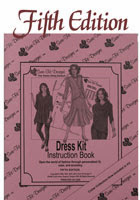
'What's all done?' you ask.  The last 3 months of 2013 producing the Master Pattern Collar Collection, the Fifth Edition Dress Kit Instruction book, and a web site face-lift kept me off the streets and out of trouble!

First - the Master Pattern Collar Collection has been added to the Dress Kit master patterns.  Now it's very simple to draw collars for your bodice neckline.  This Collar Collection is now part of the Fifth Edition Dress Kit.  Side 1 gives you the collar shapes.  Side 2 gives you detailed instruction on how to use and draw your personal shape.


I know you're going to love working with these collar patterns.
Here's a short video introducing the collection.  
After you've watched the video, I encourage you to comment, 'like' and/or subscribe to the surefitdesigns YouTube channel.  You'll receive immediate notification when a new video is published.  Also, please share this with your sewing buddies on your FaceBook page, sewing blog or forum.  One of my 2014 goals is to increase our SFD subscribers so I'm asking for your help to  'spread the word'.


Second - the Dress Kit Instruction book has been expanded from 48 to 52 pages.  The Fifth edition now has new designs and instructions for the set-in cap sleeve, the two-part sleeve (used primarily in tailored jackets), the funnel neckline design and a really pretty and comfortable high/low hemmed swing top...along with other instruction updates and clarifications.

To see a quick video explaining the Fifth Edition Dress Instruction book, watch below.  (Sorry...the video is not embedded in this blog.  For some strange reason this blogger software can't find the video, even though it is definitely on YouTube.  So the next best thing is to click on this link and watch it on the web page.  http://www.surefitdesigns.com/WhatsNew.html


If you would like to add either (or both) the Collar Collection or Fifth Edition Dress Kit Instruction book to your SFD kits and supplies, please just click here.  http://www.surefitdesigns.com/WhatsNew.html

Third - and last but not least, the main surefitdesigns.com website has undergone a face lift!  The Home Page has been totally transformed to make it easier for you to get to where you want to go.  Now you'll see descriptive icons to take you to their respective pages.  You'll see images like the following:


I hope you find it easier to select what you're looking for.  Once you've taken a browse around SureFitDesigns.com, I would appreciate your comments and feedback.  We want this to be a better experience for you in obtaining the information and getting to where you want to go quickly.  Everyone has opinions about what they like and don't like, so please leave a comment on this blog - or if you can't get the comment box to work - just sent me an email to info@surefitdesigns.com.   I seriously want your feedback - all kudos and constructive criticisms regarding the website are welcome.
Kindly,
Glenda


Pearls of Wisdom

I always learn something new from the students who attend the Sure-Fit Designs Fit & Sew Retreats.

In this recent Retreat, one of the participants, Kathy, introduced us all to this wonderful eraser!  A good eraser makes me happy!  A great eraser makes me ecstatic!  (Life's small pleasures....)

Kathy shared her Black Pearl with all of us.  What's so special about the Black Pearl?


First of all, it's easy to hold between your thumb and fingers.  With this oval shape, it's contoured just right for your hand.

Secondly, it has a great narrow, beveled edge, which means when you are erasing lines that are 1/8" to 1/16" apart, you can get the edge of the eraser in to erase the wrong line without erasing the line that you want!


Thirdly, this Black Pearl leaves very little 'eraser shavings' (that you just dust onto your floor - unless your trash bin is handy).

Why do you need such a nifty eraser?  A number of months ago I posted a blog titled - My Big, Fat, Soft Eraser.  Take a second to glance at it.  All the reasons why you need a decent eraser when drawing your patterns are listed there.  Just click here.

Now, thanks to Kathy, who discovered the 'ultimate' eraser - the PaperMate Black Pearl, I share this with you.  PS, I have no vested interest in PaperMate, I just think it's a great tool in our drawing and drafting chest.

They generally can be found at any office supply store like OfficeMax, Office Depot, Staples etc.  They come 2 to a pack and Kathy said they come in different colors too.  What fun...and so functional!

Pattern Storage Dilemma?

How do I store my vellum patterns?

I've had this questions asked of me numerous times, and I've seen others discussing this issue in the Stitcher's Guild SFD Forum.  So let's take a look at what your various options are.

Depending on your storage space in your closet or sewing room you may want to implement one of the following.

Folded in Envelopes
You can always fold the vellum patterns.  Only make enough folds to put the pattern into either a manilla envelop or plastic bag.  If it's a manilla envelop, the 9.5" x 12.5"  size works well.  Make sure you label the envelop, tape a swatch of fabric to the outside, and if you have a photo of (yourself) in the finished garment, print one out and tape it on too.  Or, if using a plastic see-though bag, the 1 quart size work really well.  Pin a swatch of fabric to the pattern and of course, label the pattern with a date drawn.  This way, it's quick and easy to identify what you designed, what fabric you used and when you sewed it.  Then just stack the patterns in a box.  To re-use this folded pattern, you can always gently press the vellum with a low heat - DRY iron.  Press just on the crease and only enough to flatten.

Rolled on a cardboard tube
Or...Save the internal tube from your tracing vellum rolls.  I particularly like the 18" wide tube from the 50 yd vellum.  It seems to be just the right length for many pattern shapes.  Of course, the tube from the 24" long vellum is excellent for larger sized pattern pieces like wide sleeve patterns.  Then roll the pattern pieces around the tube, tape or pin a swatch of fabric to the pattern, label what the pattern is and when you drew it...then put a rubber band around it.  Makes good sense...no creases to deal with when you go to re-use the pattern.

Toilet Paper Tube
A customer suggested this alternative.  She used empty toilet paper rolls - rolled the pattern pieces quite tight, stuffed them inside the toilet paper tube, then let the pattern roll expand till it fills the tube.  Clever!  Of course, label the tube and pin or tape a fabric swatch to the roll for easy identifcation.

Just simply rolled & rubber-banded
And last, but certainly not least, as I'm sure you can come up with other options, just simply roll the pattern, label, swatch it, and put a rubber band around it.  There's nothing supporting the roll, but if you gently stack these in one of those clear plastic storage bins, they shouldn't get crushed and will be easy to unroll and use the next time you want that particular pattern.

My favorite is rolled on a hard cardboard tube.  Please share your favorite storage system in the Comments box.  I know others would like to know what you do too..

luvne.com resepkuekeringku.com desainrumahnya.com yayasanbabysitterku.com