Sleeve Pitch: Increasing the Sleeve Pitch

As you read in last week's blog - Sleeves and all their Quirkiness - the Sure-Fit Designs Sleeve pattern is designed for ease of use, both in drawing and in construction, meaning the hem level is straight with a 1" (2.5cm) wide fold-up hem. A you increase the forward pitch, the hem will/should change to a gradual curve.  Additionally, the front underarm seam will bend to follow the forward hang of your arm.

Directions:

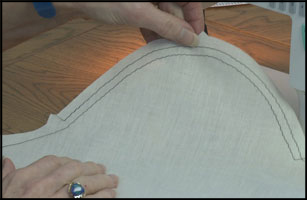
1.  Trace a copy of your SFD sleeve                    
pattern WITHOUT seam allowances or
hem allowance.  Label as shown: A - B -
C - D - E - F - G - H. (Point F & I will be
established during the drawing).


2. Extend the grainline down to the hem level, point A.


  3.  Draw a line from point A to B. 


4.  Cut from point A to B, and from C to B.  Leave a tiny paper hinge at point B - the pivot point.

5.  Pivot section A-B-C-D toward the middle of the sleeve.  Point D will move 'inward' 1/2" (1.3cm).  This is easiest done on a grain/grid board as shown.  Tape to secure.


6.  Since 1/2" (1.3cm) was taken away from the hem width on the back underarm seam, you need to add this amount 1/2" (1.3cm) to the right of point E on the front underarm seam.  Label as point F.  This maintains the same wrist circumference opening to pull the sleeve over your hand.

7.  Connect point F to G.  Point G should be smoothed slightly.  Measure both the front and back underarm seam lengths - minus the dart space on the back seam.  Underarm seams need to be the same length or a tiny bit shorter in the front (which would be eased into the back seam).  Adjust the length of the front underarm seam if necessary.


8.  F to G to H is the front underarm seam.  You may want to curve/bend this seam further.  It will depend on if you have enough elbow circumference ease for your particular arm shape.  If you'd like to shape this seam, mark 1/2" (1.3cm) toward the left of point G.  Label as point I.  Connect F to I to H.  Use the Designing Stylus to blend/shape the curve at this bend in the seam.  Now that you have substantially changed the length and shape of the front underarm seam, compare to the length of the back underarm seam - minus the dart space.  Lengthen or shorten at the hem level as needed.


 9.  The elbow dart has become slightly                            
wider.  Simply back the opening with tracing vellum. Tape securely.  Re-establish the center fold line of the dart and the new dart side seam cutting lines.


10.  At the wrist/hem level, connect point D to F in a slightly curved line.  The Designing Stylus is a great tool to draw this transition.


11.  Lastly, add 5/8" (1.6cm) seam allowances to all edges.  Because the wrist/hem level is now curved, you can't use a fold up hem allowance.  This edge will require a shaped facing.

Sew a trial sleeve to test this pattern shape on your arm. Depending on the shape and hang of your arm, you may need to further increase the forward pitch and/or change the shape of the front underarm seam.


Happy Sewing,


Sleeve Facts: Sleeves & all their quirkiness!

Setting in sleeves and having them look totally perfect on your body is challenging to say the least.  Why?  You are taking a flat piece of fabric, cutting a shape with opposing curves and placing that sleeve into a 3-dimensional armhole to go over your 3-dimensional rounded shoulder and underarm.  To give this flat sleeve pattern 3-dimensional shape, we use underarm seaming, basting stitches and ease.

Factors affecting Sleeve Fit:                                                       

1.  Cap height
2.  Cap width
3.  Shape of the cap
4.  Relationship of the front to the back of the cap
5.  Cap ease
6.  Shape of your shoulder and upper arm
7.  Underarm/bicep circumference                                                           
8.  Fabric choice (woven vs. knit)
9. Style of sleeve (tailored vs. casual)
10.  One or two-piece sleeve
11.  Sewing technique for setting in the sleeve

Of this short list, one of the most important factors is sleeve cap ease, which is the extra length the cap has that shapes the fabric to lift and fit up and around your shoulder joint.  Sleeve cap ease affects the cap height, width and shape of the cap.  It would be great if there were hard and fast rules about cap ease, but that is not eh case...it is all variable!  It varies depending on the fabric choice and the intended profile.  Is the garment a tailored jacket, a camp shirt or somewhere in between?


How much ease should the cap have?  Well, you can see it all depends on many of the above factors.

When sewing your trial bodice muslin, the back sleeve cap should have approximately 5/8" - 1/2" (1.6 - 1.3 cm) while the front should have approximately 3/8"- 1/2" (1.0 - 1.3 cm)ease.  If you end up with a little less or a little more, don't worry about it.  Depending on the fabric you're using to stitch the test, the ease may just be fine.  And, part of this will depend on your sewing skills.  There is a video tutorial on setting in sleeves - just follow this link - How to Set in the Sleeve -D.8.d Pt. 4-How to Set in the Sleeve.  This of course is just one of the ways to set a sleeve in; you may have your own preferred technique.

This discussion will go on to deal with changing the sleeve cap shape and ease, but first another extremely important determining factor in the sleeve fit is your bicep circumference and the required ease for your arm girth.  This is actually the first, if not most important factor in sleeve fit.  If the sleeve doesn't go around your arm comfortably (arm plus ease), then it won't matter what is going on with the sleeve cap ease - it's simply not going to fit or look decent.

The amount of bicep ease is once again variable and depends on its own factors, such as style or profile of sleeve and fabric choice.  A knit sleeve will need less circumference ease than a woven sleeve.  For the SFD bodice test, I usually suggest 1 1/2" - 2" (3.8 - 5.1cm) bicep ease.  If your upper arm is particularly large and you already have to widen the sleeve substantially, try to keep to the minimum amount of ease.  But if the test garment feels too tight for comfortable movement, then you'll need to add more ease.  The width of the sleeve at the underarm is always going to be the primary factor for fit.  The cap height, width and its subsequent ease will simply need to be adjusted as best as possible.  There is no magic bullet.  See Large Upper Arm Minor Tune-Up, page 18, #13 of the Dress Kit Instruction Book and/or video D.9.5 Large Upper Arm Alteration.

Sleeve Cap Shape and Ease

Let's assume you've drawn your SFD bodice front, back and sleeve pattern.  Keep in mind that many of you will have changed the shape of your armhole.  You may have 'scooped' the armhole shape more dramatically for your narrow upper chest or back blades width. Perhaps you would have watched video:  D.9.4 Refining the Fit: Dress/Shirt Armscye Modifying/Scooping the Armscye Curve.


Now it's time to check how much ease the sleeve cap has.   Measure the armscye curves from underarm point #2 to shoulder point on both front and back bodice.  Then measure the sleeve cap from back underarm point #2 to cap notch and front underarm point #2 to cap notch.  Stand the tape measure on edge to do this.  Compare back cap to back armscye length and front cap to front armscye length.  You're looking for approximately 5/8"-1/2" (1.6-1.3cm) ease in the back while the front should have approximately 3/8"- 1/2" (1.0 - 1.3cm) ease.  As mentioned above, these numbers are flexible based on previously stated variables.


 Changing the sleeve cap ease depends on the length of the line.  A curved line going from point A to B is going to measure longer than a straight line going to and from the same points.  Whether you need to add or subtract cap ease, you can change the height of the cap, increase or decrease the shape of the cap curves or change the width of the bicep.

As an example, if you need to decrease cap ease and you have a small bicep, consider decreasing the underarm points - bringing them in to a smaller number.  Even if you have a small bicep, you can always apply the principle of adding approximately 1 1/2" - 2" (3.8 - 5.1cm) bicep ease and comparing the the master pattern.  But if you have a large upper arm/bicep, you likely won't be reducing the width of the sleeve once you've established your correct circumference + ease, so that leaves the cap height and width (controlled by the curve of the cap) to make changes in sleeve cap ease.

How to change Cap Ease - 3 Alternatives:


1. Decrease/increase cap height


2. Decrease/increase cap width


 3. Decrease/increase bicep width 


The Pitch of the Sleeve

We've all seen sleeves that have a more or less diagonal fold
coming from around the elbow and and heading up toward the
cap. **Please note that this is going to happen on all one-piece
sleeves to some degree.  That is because your arm does not hang
down the side of your body in a perfectly straight line.  From the
elbow, your forearm pitches forward.


Many one-piece sleeves are basically straight.  Placing this straight piece of fabric on your slightly forward-pitched arm will cause the upward diagonal fold from the elbow up because that's where your arm starts to bend.  Some one-piece sleeves do have a slight forward pitch below the elbow dart, as does the Sure-Fit Designs sleeve, but unless this pitch is rather dramatic, or you have a two-piece shaped sleeve, it really isn't possible to totally remove this diagonal fold.  It's simply part of the overall make-up of the one-piece sleeve.

For ease of simplicity, the SFD sleeve has a slight forward pitch with a 1" (2.5cm)) wide fold up hem allowance.  If you would like to increase the forward pitch, make sure to read next week's blog.  As you will see in making this change, the hem will curve meaning it would need to be hemmed with a shaped facing.

In closing, this article offers a lot of information and food for thought on the topic of set-in sleeves.  My intention in offering this to you is not to overwhelm, but rather to give you facts that may pertain to you that will enhance your personalized sleeve fit.

Happy Sewing!
Glenda...the Good Stitch!


SFD Shirt Kit Giveaway Contest

Satisfy your curiosity!  Sure-Fit Designs and Glenda the Good Stitch announce a new teacher association with Curious.com - a leading internet provider of courses and lessons on everything from 'soup to nuts' (of course, sewing & fitting too).  Curious.com is a 'Craftsy-like' site offering over 17,000 lessons on so many topics too numerous to mention.

Glenda's latest Shirt Kit tutorial is the 'Go Everywhere Shirt' and is available exclusively on Curious.com.

Follow the link directly below to join Curious.com and receive the following:
  • 1 week totally FREE (for as many courses as you choose to watch.  There is no on-going financial obligation unless you decide to purchase a monthly or annual membership).
  • Time to decide if you'd like the membership.
  • Low annual fee to learn anything that Curious offers.
  • You'll receive an automatic 20% off your membership fee which is exclusive for Sure-Fit Designs customers when you click this JOIN link.
  • While in Curious, we invite you to participate in Glenda's new online course - the SFD 'Go Everywhere' Shirt.  This course is available exclusively on Curious.com.  This course includes 10 lessons, participant interaction, resource links, and a downloadable 5-page pattern designing & sewing construction guide.

JOIN NOW!

 Win the Sure-Fit Designs Shirt Kit
Enter the contest below

To celebrate this new association with Curious.com, we are offering a Giveaway/Contest for the Sure-Fit Designs Shirt Kit (or $35 toward any SFD item if you already have the Shirt Kit).

To enter simply CLICK HERE


I invite you all to participate.
Kindly,
Glenda...the Good Stitch!

Fitting Refinement: Dealing with the Skirt Dart

    I hear this all the time - 'How can I remove the dart?' Darts in fabric help to shape the flat fabric to our body curves and actually are very special since they can give you such great fit.  When someone asks how to eliminate the darts, I often suggest ways to move them or change them into pleats, tucks or gathers, but if you're very flat in the front and still want total removal, read on.

The Sure-Fit Designs skirt darts provided on the Dress Kit Master Patterns are straight, uni-positional darts.  Both the skirt front and back darts are intended to line either a one or two-piece dress in any number of variations.

When using the skirt pattern to sew just a skirt, you may want to re-evaluate the front and back hip darts to obtain your very best fit.  What is done with the dart will depend on your body shape and the style of skirt you want.  Darts can be stitched in straight or curved lines and dealt with in a number of different ways.

The relationship between two different circumferences will determine the dart width, length and shape is best for you.  For example, if your waist is 35" (90 cm) and your hips are 45" (115 cm), this 10" (25 cm) difference will be controlled and shaped by the darts in both front and back.  The greater the difference between the two circumferences, the wider the dart will be and the greater the resulting fabric bulge. The person who has heart or diamond-shaped hips will require wider darts than the straight-shaped boyish figure. 
Your front tummy fullness, front and back hip curvature and buttock curves will affect the width of each dart.  Just always keep in mind that the given Sure-Fit Designs darts can be re-shaped to your specific needs.

The rounder, fuller heart-shaped figure may want to stitch her darts in a concave curve (inward curve).  Also she may want to shorten the dart length.  A dart should not extend beyond your fullest point or bulge.  In fact, with skirts, the dart should stop about 1/2" (1.3 cm) back from your dominant fullness.  See page 29 - Dress Kit Instruction book. 

The diamond-shaped hip figure may need to stitch the dart longer than that given on the Master Pattern.  If it stops too short or abruptly, the resulting dart tip won't give correct shaping to your fuller lower hip.  Therefore extend the dart until it best conforms to your body.

If you happen to have prominent hip bones, you can also divide the dart in two.  Usually the dart closest to the side seam is slightly shorter and aimed toward the dominant bone. The resulting two narrower darts must equal the width of the original dart.  See page 29 - Dress Kit Instruction book.

The straighter-shaped figure type may need to reduce the width of the dart since the difference between the waist and hip circumference is smaller, or you are just simply flatter in the front of your body.  To reduce the dart width in half, follow these steps.

1.  The original Sure-Fit Designs skirt front dart is 1 1/2" (3.8 cm) wide.  Redraw so that the dart is now 3.4" (1.9 cm) wide.
2.  Then to maintain similar side seam shapes from front to back skirt patterns, remove 3.8" (1 cm) from both front and back side seams beginning at the waist point and tapering to nothing at the high hip.
Now, if you have an extremely flat front and there is next to no difference between your waist and hip circumference, you may want to remove the dart completely.  This particular technique will remove some of the existing hip ease as you close the waist dart, but since the Sure-Fit Designs Skirt pattern initially gives you 3" (7.6 cm) ease at the hip level, it still should fit adequately.

1.  Draw a line parallel to CF from the tip of the dart to the hem level.

2.  Draw 2 lines from the sides of the dart to the hem level.  Cut to remove this elongated dart.

3.  Close the dart space as shown.
True/blend the waist edge curve.


This tutorial simply gives you more options of how to deal with the darts in the skirt pattern.

Kindly,
Glenda...the Good Stitch!

SFD is Mobile-Friendly!

Drum roll please!

For your viewing and shopping convenience, Sure-Fit Designs has mobilized.  We've come of age and now have a mobile-friendly website!  What does that mean for you?  For those of you that have smart phones with modern browsers, like iPhones & Android devices, you'll now have easier viewing of the Sure-Fit website offering you educational articles, fitting & sewing videos, fashion & design ideas, as well as shopping capability.

You still use the same web address - www.surefitdesigns.com.  When this address opens up in your smart phone, the address will automatically become m.surefitdesigns.com (m=mobile).  You don't need to make any changes...we've done it all for you!

See the new design and how to navigate from one page to the other.
Home Page:
This is the HOME page.  To keep it uncluttered, there are only 2 rows of navigation links.  To access more pages simply click on 'More Options', which is the link that has been highlighted in red above.

 Navigation Links:
When you click on 'More Options', this is the panel of navigation links.  Each link is active and will take you to the relevant page.  The most viewed pages have been made 'mobile-friendly'.

 Page Example:
This image shows an example of one of the pages - that being the Dress Kit page.  Most pages now have the data displayed in one long column to fit your phone.  To navigate or move to other pages, click on the '3-lines' icon that is highlighted in the red box in the upper right corner in the image above.

Navigation Links:
Navigation links drop down.  From here, click the forward arrow for your desired page.  See the red box above.  This is simply another way to access the many pages of information provided in the Sure-Fit Designs website.

Smart phones vs. Tablets?
If you're wondering about your tablet, mobile-only websites do not currently display on tablets, like the iPad or Galaxy.  These devices generally have larger viewing screens than most smart phones.  Typically a mobile website on these devices does not improve the user's experience.  When http://www.surefitdesigns.com is viewed on a tablet, you will be seeing the original site and content.

It's so easy to keep in touch with Sure-Fit Designs!
Kindly,
Glenda...the Good Stitch!

Adapting and Drawing the Pants Front Waist/Crotch Grid for a Thick Waist and a Relatively Short Front Crotch Length

If you have a fairly short front crotch length measurement and you have a relatively thick waist, when drawing the pants pattern, you may find that your numbers 'fall off the Master Pattern Grid lines'.  This situation may occur when you are establishing the intersecting point for your waist measurement and front crotch length measurement on the Pants Front Waist/Crotch Grid.  In other words, the grid lines stop before your two numbers of waist measurement and front crotch length measurement have a chance to intersect.  These photos show and example of the type of body shape where this may occur.
 If this occurs, simply extend your appropriate grid lines straight down.  The waist measurement line (attached to your waist measurement number) will be drawn straight down.  The front crotch length measurement number will be extended downward but continuing on in its current angle and slope.

See the example diagram below where the person's waist measurement is 46" (116.6cm) and the front crotch length is 11 1/2" (29.2 cm).  Note how these lines have been extended and shown in continuous RED lines.  The BLUE dot represents where the two lines intersect.  This is where you would mark your placement dot for your CF waist measurement.  This dot, of course, would then connect (in either a straight or curved line) to your front side waist measurement dot.  And you would then continue to proceed to mark in your Dart tip and then your Front Crotch Pt. #1 and Pt. #2.  These steps are found in your Pants Kit instruction book, page 9, steps 9 and 10.


 Fine Tuning Your Pattern's Crotch Lengths - if Necessary
Once you have drawn your Back and Front Crotch lengths, also make sure you measure the finished lengths.  Since you are measuring a curve, remember to stand the tape measure on edge and walk the tape around the stitching line to ensure accurate length measurements.  The instructions and illustrations for this step are found in your Pants Kit instruction book on page 10, #13 - Fine Tuning Crotch Lengths.

Glenda...the Good Stitch!

SFD Introductory How-To DVD-on sale for a limited time

The most up-to-date introductory DVD on how to draw off your Sure-Fit Designs patterns is now on sale.  If you don't yet have the latest SFD How-To DVD (new as of 2015), now is your opportunity.

It's regularly $29.95.  Currently it's on Sale for 20% off.  Sale price is $23.95 (+ S&H) and will be until Aug. 23, 2015.

Click Here to order.


What you'll get:

  • 2 DVD's ~ 4 hr. of video instruction
  • How to take accurate measurements for pants, bodice, skirt, the uni-sex Shirt Kit, Children's patterns & Men's Pants.
  • Filmed in HD for clarity
  • Close-ups for detail
  • See how to design for dresses/blouses/skirts/pants & shirts
  • Beginner to advanced will benefit with this DVD tutorial

Save 20% - Click Here to order.

For a brief video overview of this How-To DVD, watch this short overview.

Enjoy!
Glenda...the Good Stitch
 

Removing Horizontal Fold Under the Tummy

Some women experience horizontal fullness or bagging directly beneath their tummy and just before the crotch curve begins.  Once you've sewn your test muslin for your pants, if this is occurring, you will find one suggestion for a minor tune-up on page 12 (#1) of the Pants Kit Instruction Book.  This may be a satisfactory refinement for you.


Another alternative is to remove this fold of fabric at CF. Follow these directions:
1.  To determine how much you need to remove, pinch out the fabric in a tiny fold.  If you pinch out 1/4" (.6cm), this will mean that you will be totally removing 1/2" (1.3cm).


Close-Up of dart/tuck wedge from CF going to nothing at the side seams.


2.  Mark this level location of CF of the crotch seam.  Draw a perpendicular line (to the grainline) over to the side seam.  Mark point A and B.


3.  Cut from CF to side seam, leaving a small hinge of paper at the side seam. This will act as a pivot point.  Secure the pivot point with plastic tape.


4.  Overlap the CF seam the amount you require, thereby crating a small horizontal dart or tuck which begins at CF and goes to nothing at the side seam.

5.  True the CF crotch seam.

6.  The more you overlap at CF, the more the waist edge tilts down and angles the CF seam.  To maintain the original orientation of the upper CF seam, when you true the crotch seam, you will be crating a narrow wedge as indicated by the green arrow.  (The blue line indicates where CF at the waist edge originated).


7.  Cut/remove this narrow wedge and tape it back in place at the side seam waist edge.  This will maintain the correct waist circumference and true the side seam shape so that it will sew in the same curve to the back side seam.


8.  Redraw and reposition the front hip-fitting dart to best suit your body contours.

9.  Bring the straight of grain up from the leg.


This process will shorten the CF crotch length by the amount of the dart/tuck.  Be aware that you may need to add this amount on to the back crotch length so that you maintain your overall crotch length requirement.

Happy Sewing!

Glenda... The Good Stitch


luvne.com resepkuekeringku.com desainrumahnya.com yayasanbabysitterku.com